How to Identify Your Child’s Hair Type
Disclosure: Some of the links in this post are affiliate links. This means if you click on the link and purchase an item, I will receive an affiliate commission at no extra cost to you.
Every curl on your child’s head tells a little story. Some coil tight, some wave loose, and some do both in the same ponytail. That mix can feel confusing on wash day if you are not sure what you are actually working with.
Learning how to identify your child’s hair type is the first step toward a routine that fits. Once you know the pattern, the products, the styles, and the timing all start to make more sense.
A lot of parents jump straight to buying products without checking the basics first. Our guide on The Different Kids Hair Textures Explained breaks down texture versus type, and it helps this whole process click faster.
This post walks through simple ways to identify your child’s hair type using water, a mirror, and a little patience. Pair it with Hair Type 2/3/4: Care Guide for Kids once you know the pattern, and you will have a full routine ready to go.
Why Knowing Your Child’s Hair Type Matters
Hair type is not just a label for a chart. It tells you how much moisture the hair needs, how it reacts to heat, and how long it takes to dry.
A child with coily hair often needs richer products than a child with wavy hair. Skipping this step is one reason so many routines fail before they even start.
Once you match your approach to the actual hair in front of you, styling gets faster and breakage drops.
Guessing at hair type often leads to buying the wrong products over and over.
A parent might reach for a lightweight spray that works great on wavy hair, only to watch it do nothing for tight coils that need heavier cream.
That wasted trial and error costs time, money, and patience on busy mornings.
Taking a few minutes to properly identify your child’s hair type now saves a lot of frustration later.
It also helps you set realistic expectations, since some patterns naturally take longer to detangle or style than others.
The Four Main Hair Type Categories
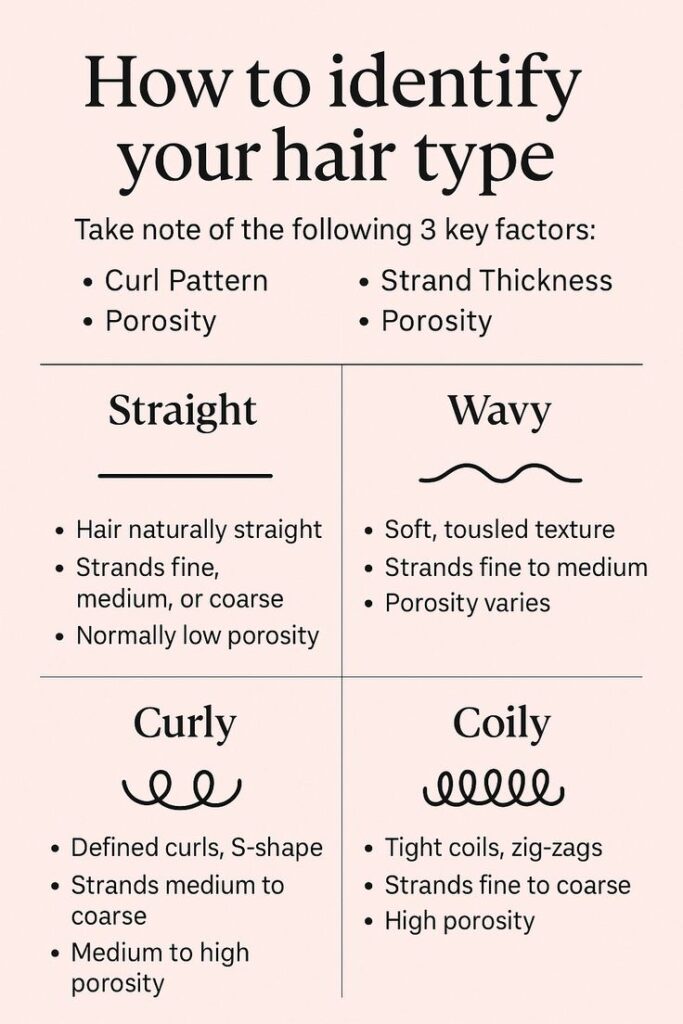
Hair typing uses a simple number system from one to four. Each number describes a curl pattern, from straight strands to tight coils.
Most kids fall somewhere between two categories, and that is completely normal. Knowing the basics of each type gives you a starting point for everything else.
Read through all four before deciding where your child fits, since it is easy to assume the wrong category from memory alone.
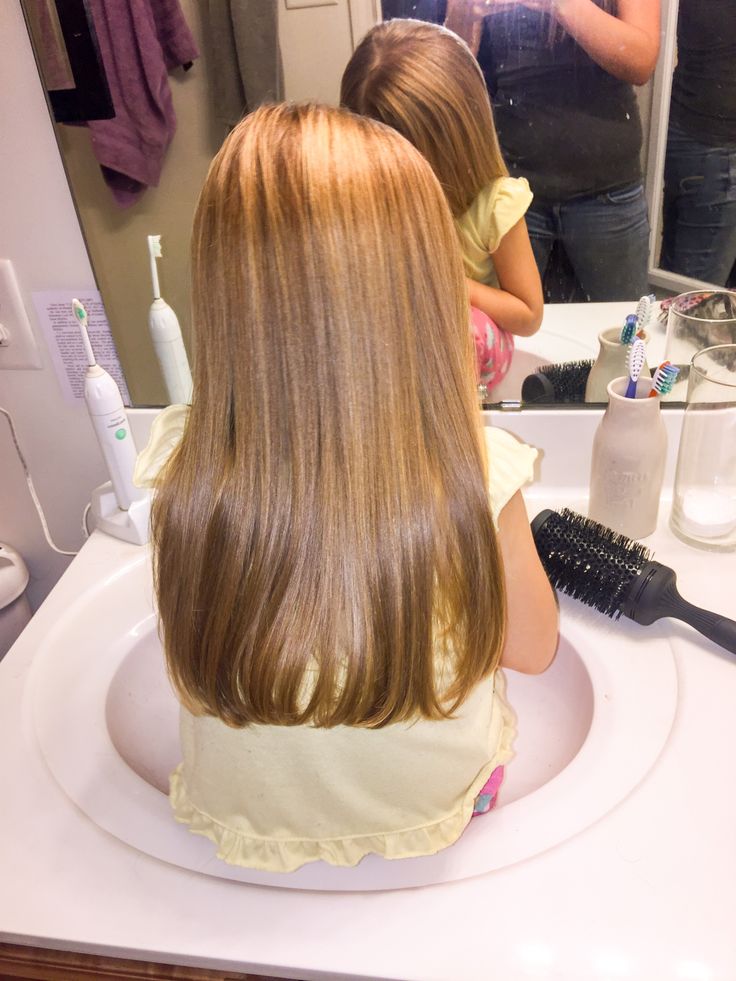
Type 1: Straight Hair
Type 1 hair has no visible curl or bend. It tends to lie flat and can look shiny because oil travels down the strand easily.
This type is less common in mixed and Black hair care communities but still shows up in some children.
Straight hair usually needs lighter products so it does not look weighed down.
Type 2: Wavy Hair
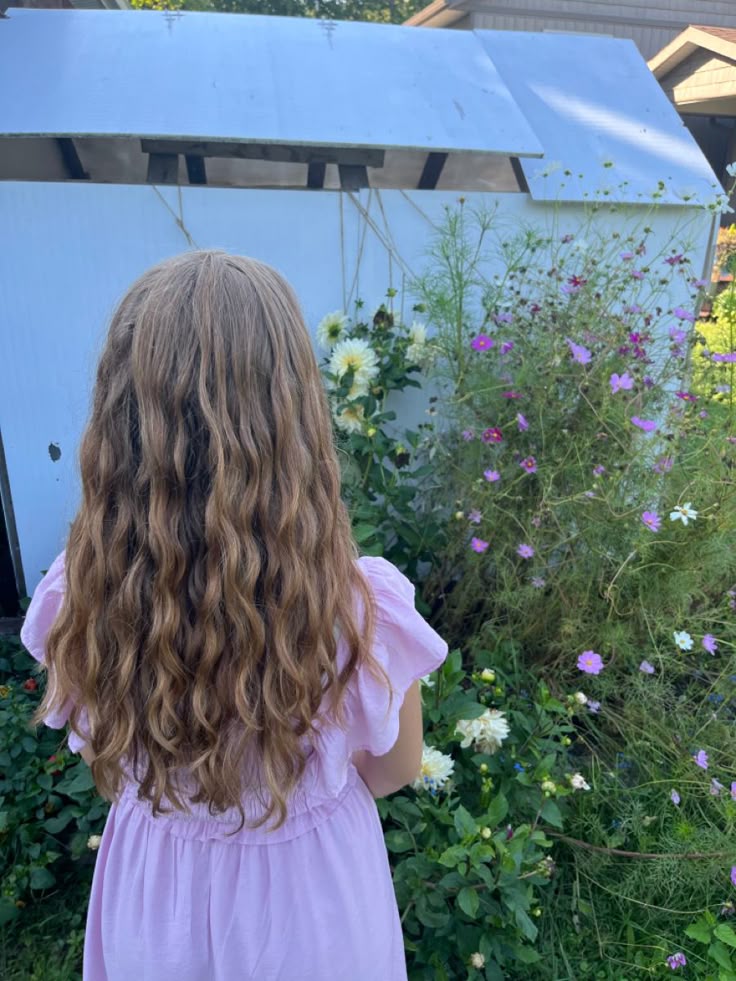
Type 2 hair forms loose S-shaped waves, usually starting at the ear or below.
It has more texture than straight hair but still holds some natural shine.
Waves can flatten with heavy products or perk up with the right styling cream.
Kids with type 2 hair often do well with light leave-ins and gentle brushing.
Type 3: Curly Hair
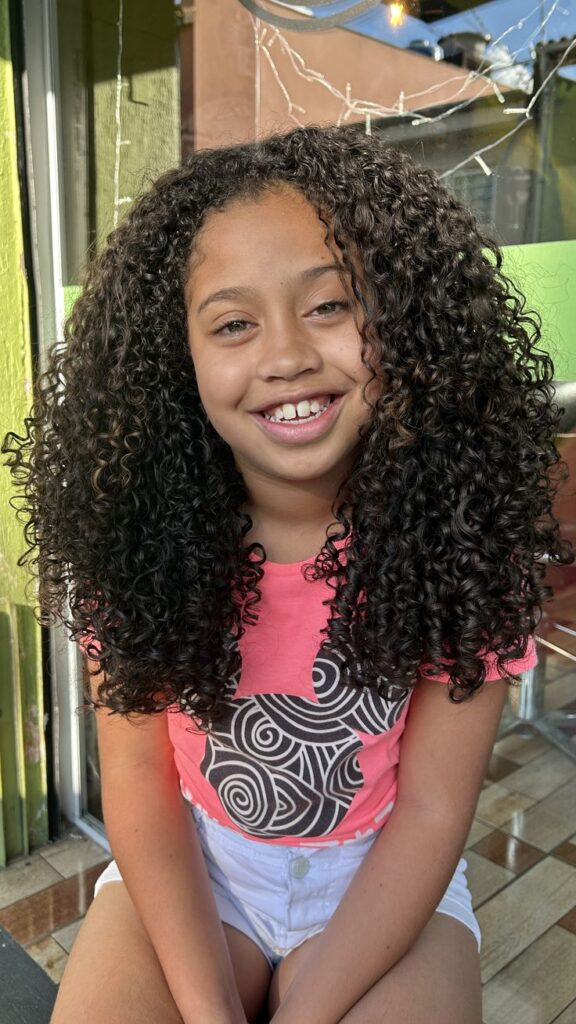
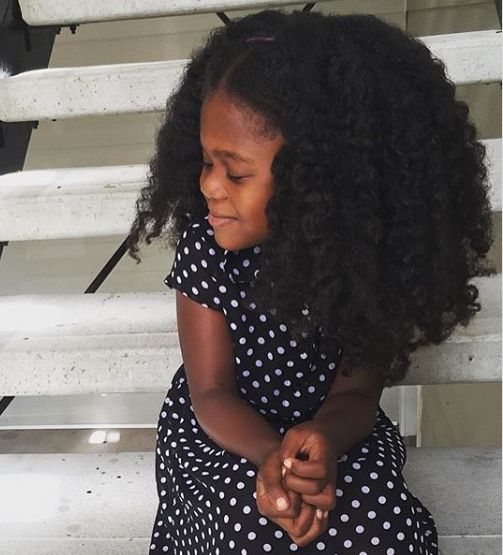
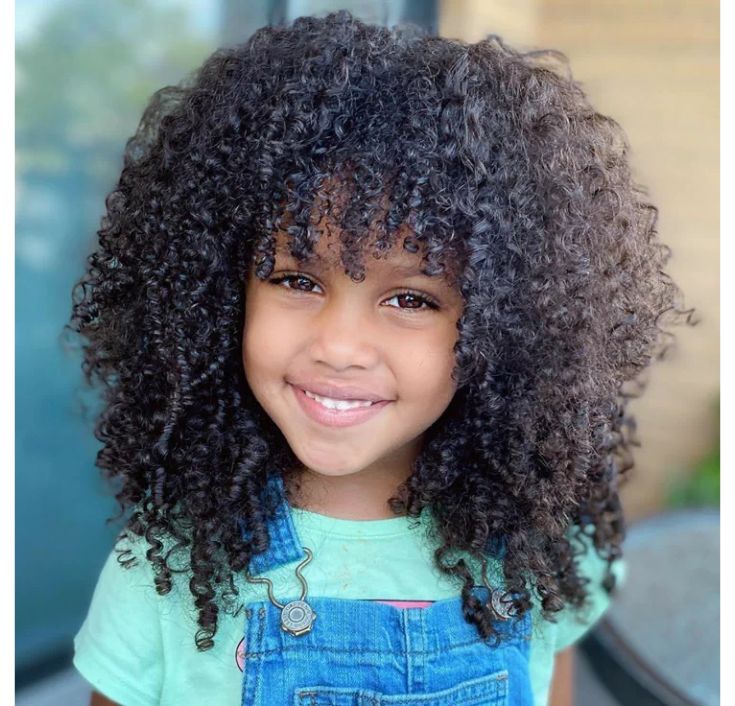
Type 3 hair forms springy loops that range from loose curls to tight corkscrews.
This type tends to be drier at the ends and needs consistent moisture to stay soft.
Curls in this range respond well to finger detangling and creamy styling products. Frizz is common here, especially in humid weather.
Type 4: Coily Hair
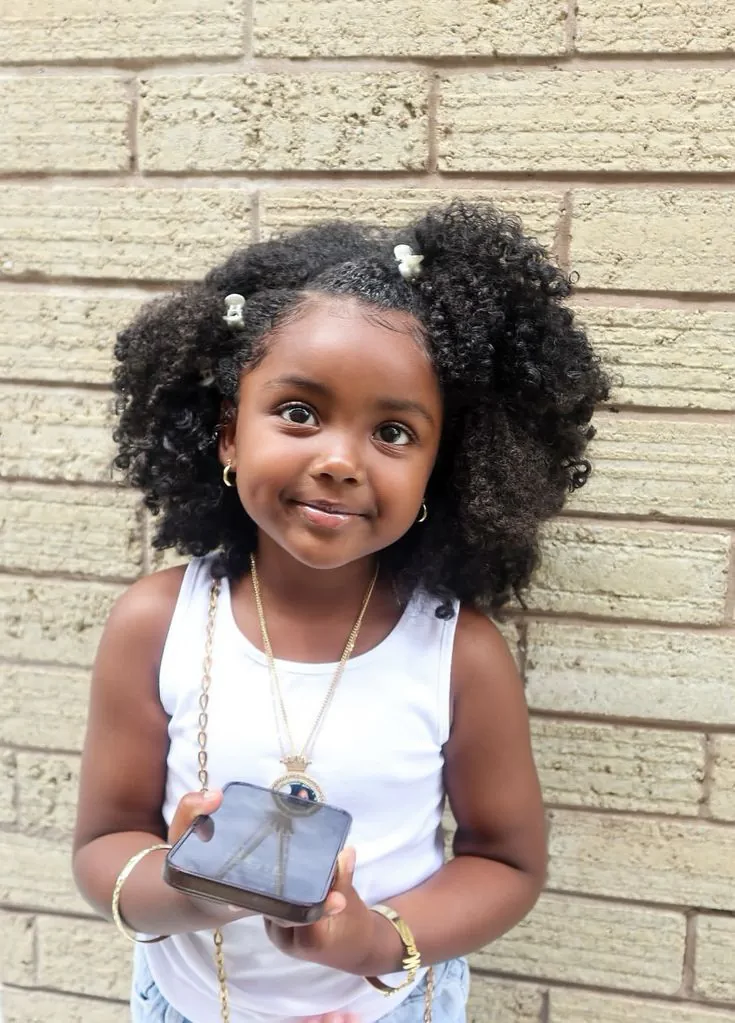
Type 4 hair forms tight coils or zigzag patterns and shrinks significantly when dry.
This type is the driest of the four and needs the most moisture and gentle handling. Coily hair often looks shorter than it really is because of natural shrinkage.
Protective styles work especially well for this texture since they reduce daily manipulation.
How to Test Your Child’s Hair Type at Home
You do not need fancy tools to figure out your child’s hair type.
A few simple checks at home can tell you almost everything you need to know. These tests work best on freshly washed hair with no product buildup. T
Try more than one method for the clearest picture.
The Wet Strand Test
Wet a small section of hair and let it hang without touching it. Watch how it falls as it starts to dry naturally.
Straight hair will lie flat, waves will bend gently, and curls or coils will spring or coil tighter.
This test works best right after a wash day.
The Shrinkage Test
Stretch a curl gently between two fingers and then let it go. Curly and coily hair types shrink noticeably once released.
The more dramatic the shrinkage, the tighter the curl pattern usually is.
This test is especially useful for coily hair, since shrinkage can hide true length.
The Mirror Check
Have your child stand in front of a mirror with damp hair.
Look closely at one section near the crown and one near the nape.
Hair type can vary across the head, so checking multiple spots gives a fuller picture.
This simple visual check pairs well with the wet strand test for confirmation.
Mixed Hair Types Are Normal
Most children do not have just one hair type across the entire head.
It is common to see tighter coils at the nape and looser curls near the crown.
This mix happens because hair follicles are shaped slightly differently in different areas of the scalp. Instead of forcing your child into one category, treat their hair as a blend and adjust your routine section by section.
Our post on Signs Your Child’s Hair Is Healthy explains what a well cared for mixed texture actually looks like day to day.
Splitting your child’s hair into sections before testing makes mixed patterns much easier to manage.
Try testing four separate areas, the crown, the nape, and both sides, then compare the results.
You might find waves near the front and tighter coils near the back, and that is perfectly fine.
Once you know where each pattern sits, you can apply products more heavily in the areas that dry out fastest.
Texture, Density, and Porosity Are Different From Type
Hair type describes curl pattern, but a few other traits shape how that hair actually behaves day to day. Texture, density, and porosity all work alongside hair type, not in place of it. Understanding all four together gives a much clearer picture than hair type alone. Each one plays its own role in product choice and routine.
Texture
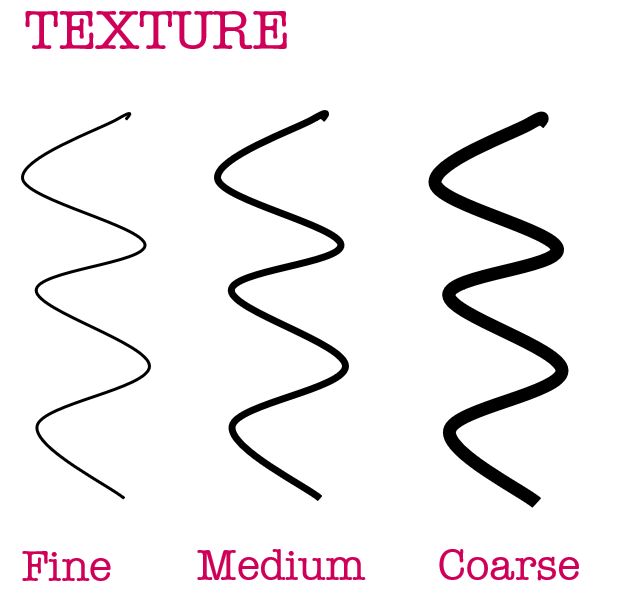
Texture refers to how thick or thin each individual strand feels, not how it curls.
Fine strands feel thin and can look flat under heavy products, so lighter leave-ins work best.
Medium strands sit in between and usually hold styles well without much fuss.
Coarse strands feel thicker and can handle richer creams and oils without looking greasy.
Matching product weight to strand thickness makes the biggest difference here.
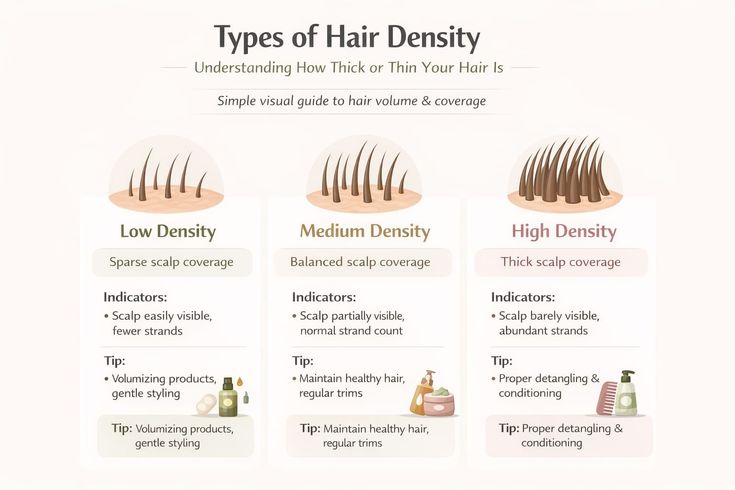
Density
Density describes how many strands are packed onto the scalp, from sparse to very full.
Low density hair shows more scalp and looks fuller with lightweight volumizing products.
Medium density sits comfortably in the middle and works well with most standard products.
High density hair takes longer to detangle and wash since there is simply more hair to work through.
Sectioning hair helps speed things up at higher density levels.
Porosity
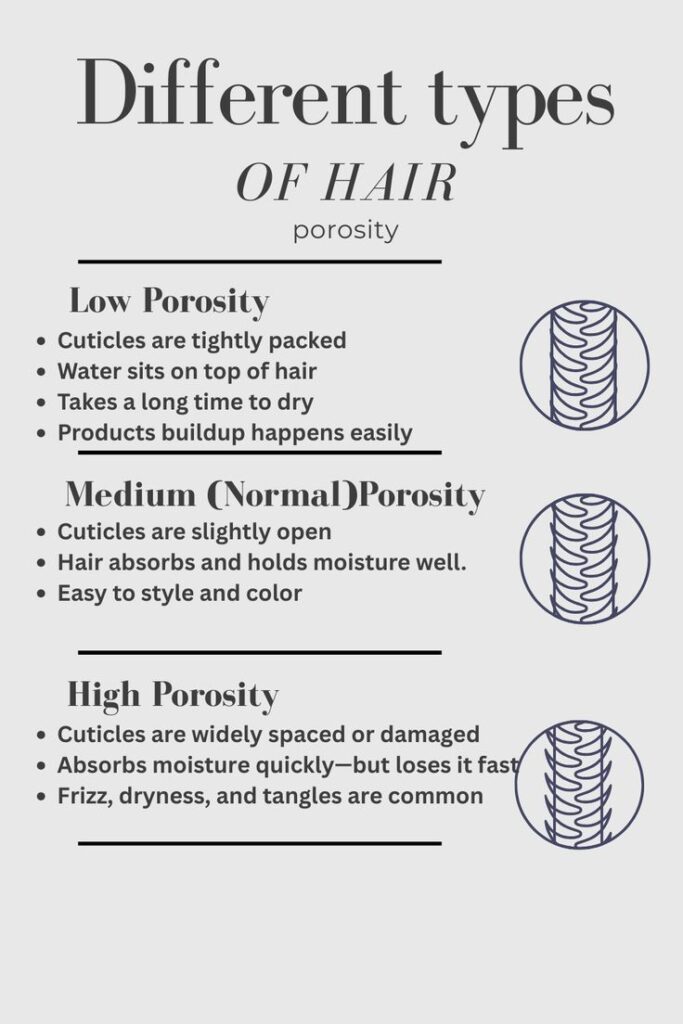
Porosity measures how well hair absorbs and holds onto moisture.
Low porosity hair has tightly closed cuticles, so water beads on top and buildup happens fast with heavy products.
Medium porosity absorbs and holds moisture well and is generally the easiest to manage.
High porosity hair soaks up moisture quickly but loses it just as fast, leading to more dryness and frizz.
Matching product weight and richness to porosity level keeps hair balanced.
For a deeper breakdown of how these pieces fit together, check out How to Build a Healthy Hair Routine for Kids.
Common Mistakes Parents Make When Guessing Hair Type
Many parents assume their child’s hair type will match their own, but genetics do not always work that way.
Others judge hair type from dry, tangled hair instead of clean, product-free strands, which skews the results.
Some parents also assume one hair type applies to the whole head instead of checking multiple sections.
A few give up too soon and settle on a guess without testing anything at all.
Taking your time with these home tests avoids wasted money on the wrong products.
If breakage keeps showing up no matter what you try, our post on 15 Reasons Your Child’s Hair Keeps Breaking (and What to Do About It) covers other factors worth ruling out.
Comparing your child’s hair to photos online is another common trap.
Lighting, filters, and product buildup can make online examples look nothing like real, unstyled hair.
Your child’s actual pattern, tested at home under normal conditions, will always be more reliable than a picture on a screen.
Trust what you observe over several wash days rather than a single snapshot.
How Hair Type Should Shape Your Routine
Once you know your child’s hair type, every part of the routine gets easier to plan.
Wash frequency, product weight, and styling techniques all shift depending on the pattern you are working with.
Coily and curly hair usually need washing spaced further apart to avoid stripping natural oils, while straighter types may need more frequent washing.
Our guide on How Often Should You Wash Your Child’s Hair? breaks this down by type so you are not guessing.
Product choice matters just as much as timing.
Thicker curl patterns typically need creamier leave-ins and natural oils to seal in moisture. Lighter types usually do better with lightweight sprays that will not weigh hair down.
Take a look at The Best Hair Oils for Children’s Hair and Leave-In Conditioner vs Hair Milk for Kids to match products to the pattern you identified.
Detangling tools should also match hair type for the best results.
Tighter curl patterns usually respond best to wide-tooth combs and finger detangling, while looser waves can often handle a regular brush.
Our comparison on Wide-Tooth Comb vs Detangling Brush walks through which tool fits which texture.
Pairing the right tool with the right technique from The Secret to Tear-Free Detangling can turn a stressful task into a calm part of the day.
Shampoo and conditioner formulas matter too, since heavier curl patterns often need extra slip and moisture.
How to Choose the Right Shampoo for Kids and The Best Conditioners for Every Hair Type both explain how to shop with your child’s specific pattern in mind, instead of grabbing whatever bottle looks appealing on the shelf.
Signs You’ve Identified the Right Type
You will know you have the right hair type once your routine starts working smoothly.
Detangling gets faster, breakage slows down, and styles hold shape longer than before. Curls or waves look defined instead of frizzy or limp, depending on the pattern.
If something still feels off after a few weeks, it may be time to retest, since hair type can shift slightly with age, season, or hormonal changes.
A healthy scalp also plays a role in how curls form and behave, so it helps to check in on that too.
Our post on The Best Scalp Care Routine for Children explains how scalp health connects directly to curl definition and growth.
Another good sign is shorter styling time overall.
Once products and tools match the actual pattern, sessions that used to take an hour can shrink down considerably.
Your child may also start sitting still more easily, since the right technique tends to pull and tug less. Small wins like these are a strong signal that the identification process worked.
When Hair Type Testing Gets Confusing
Sometimes home testing does not give a clear answer, and that is okay.
Product buildup, recent heat styling, or even the weather on testing day can all throw off the results.
If curls look looser than usual after a humid week or tighter after a dry spell, try retesting on a calmer day.
Washing with a clarifying shampoo beforehand also helps strip away anything masking the natural pattern.
If results still feel unclear after a few attempts, a licensed stylist who specializes in textured hair can offer a second opinion.
Many salons offer quick consultations without requiring a full appointment.
A stylist can also point out density and porosity differences that are harder to catch at home.
There is no rush to land on a perfect label, since the goal is simply a routine that works well for your child.
Frequently Asked Questions
Can my child’s hair type change over time? Yes, hair type can shift as children grow, especially during puberty or after illness.
Hormones affect the hair follicle shape, which can loosen or tighten the natural curl pattern.
It is worth retesting every year or two, especially if products stop working the way they used to.
Is it normal for siblings to have different hair types? Very normal. Genetics mix in unpredictable ways, so siblings can have completely different curl patterns even with the same parents.
Comparing siblings side by side is a great way to see how varied hair type really is within one family.
Does hair type affect how often I should trim my child’s hair? Hair type plays a role, but breakage and split ends matter more than the type itself.
Coily and curly types often show damage differently than straighter types, so check ends closely regardless of pattern.
Our post on The Hidden Reason Your Child’s Hair Looks Dull covers signs that a trim might be overdue.
What if I can’t tell the difference between two hair types? That is extremely common, since many kids sit right between categories.
Focus less on picking an exact number and more on how the hair behaves day to day. Product results will tell you more than a strict label ever could.
Do I need different tools for different hair types? Tools do make a real difference for detangling and daily maintenance.
The Best Hair Brushes for Kids covers options across textures, so you can match tools to your child’s actual needs instead of using one brush for everything.
Should I test hair type on wet or dry hair? Both checks add value, but wet hair usually shows the truest pattern.
Dry hair can hide curl definition under frizz or product residue. Try testing right after a wash, before any styling product goes in, for the most accurate read.

Final Thoughts
Figuring out your child’s hair type does not require expensive kits or guesswork.
A few simple tests at home, done with clean and product-free hair, will tell you almost everything you need.
Once you know the pattern, product choices, wash schedules, and styling techniques all become much easier to plan.
Hair type can shift over time, so check back in every so often instead of assuming nothing has changed.
With a little observation and patience, wash day stops feeling like a mystery and starts feeling like something you and your child can handle together.
16 Comments